[更好的阅读体验](https://sophonci117.me/archives/2228098991/)
## Hexo 博客的自动部署
使用 Hexo 发布博客最原始的方法自然是直接编辑完文件后 `hexo clean && hexo g && hexo d`,但这种做法长期来看存在以下问题:
1. 迁移不便,在其他地方编写博客时,要么把笔记本背着到处跑,要么将整个文件夹复制到 U 盘里然后带着,并且事后同步博客也很不方便。
2. 需要在本地配置 Node.js 环境,并且可能因为 Node.js 出现各种奇奇怪怪的问题。
3. 本地部署消耗资源。
所以自动部署就成了 Hexo 博客的常见部署方式。
### CI / CD 服务
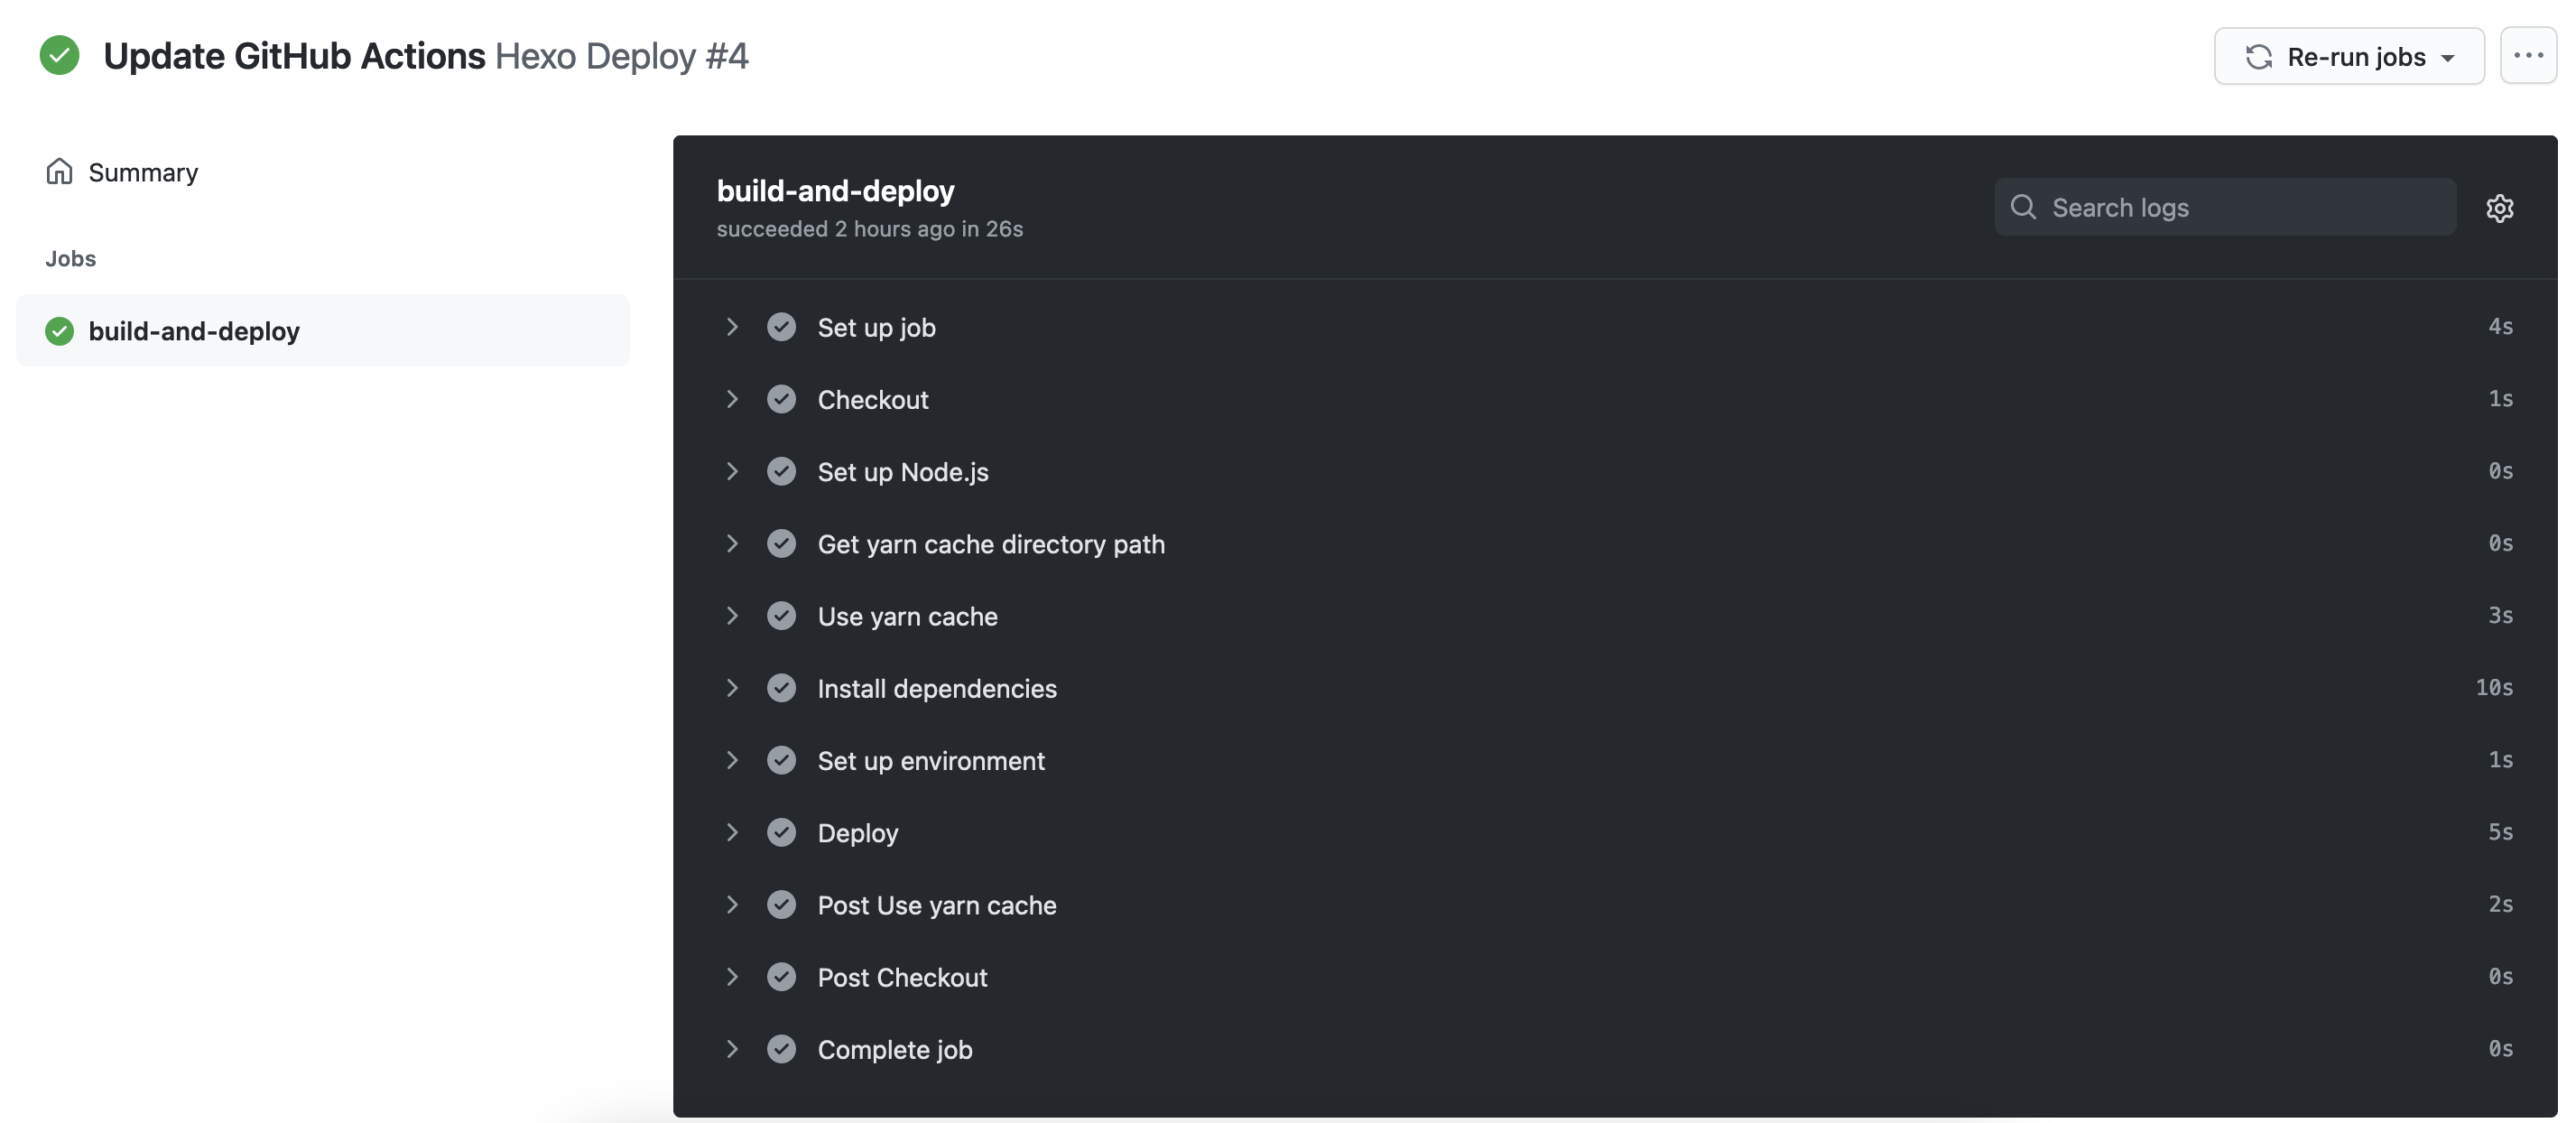
常见的自动部署服务有 Travis CI、Netlify、Vercel 等,但这些自动部署服务大多在国内访问都不通畅,部署到 GitHub Pages 则需要通过 Token 这种不安全的方式。相较之下,GitHub Actions 就脱颖而出了:它是 GitHub 直接集成的!这就意味着 GitHub Actions 可以直接使用 GitHub 仓库的密钥,用 SSH 推送到 GitHub Pages 仓库。并且 GitHub Actions 的速度也足够快,部署 Hexo 博客往往只需要 30s 左右。同样的,因为本身是 GitHub 的集成服务,GitHub Actions 的使用也比其他服务要简单,只需新建一个文件即可。
## GitHub Actions 的使用
### SSH 密钥
使用 GitHub Actions 时最好用 SSH 这种安全的方式推送到你的仓库,所以我们要先生成一个新的 SSH 密钥:
```bash
ssh-keygen -f hexo-deploy-key -C "yourname.github.io"
```
这个命令会在当前目录下生成 hexo-deploy-key.pub(公钥)和 hexo-deploy-key(私钥)两个文件
**注意**:我的 Hexo 源文件存放在 blog 仓库,GitHub Pages 部署在 HeliumOI.github.io 仓库,后面的配置请读者按照自身情况进行调整。
首先进入你的页面文件仓库(即 yourname.github.io),打开 Settings -> Deploy keys,添加一个 Deploy key,名称随意,内容为文件 hexo-deploy-key.pub 的内容。注意一定要勾选下面的 `Allow write access` 选项,否则部署时这个密钥无法用来推送到仓库。
然后进入你的 Hexo 源文件仓库,打开 Settings -> Secrets,添加一个 Secret,名称为 `DEPLOY_KEY`,后面我们需要在 Workflow 中通过名称 `DEPLOY_KEY` 使用这个密钥,内容为文件 hexo-deploy-key 的内容。
### Workflow 文件
在 Hexo 源文件夹中新建一个文件 `.github/workflows/deploy.yml`,我的配置如下:
```yaml
name: Hexo Deploy
# 只监听 master 分支的改动
on:
push:
branches:
- master
jobs:
build-and-deploy:
runs-on: ubuntu-latest
steps:
# 获取博客源码和主题
- name: Checkout
uses: actions/checkout@v2
# 主题文件夹,如果你的主题不是 git submodule 可以不配置
- name: Checkout theme repo
uses: actions/checkout@v2
with:
repository: jerryc127/hexo-theme-butterfly
ref: master
path: themes/butterfly
# 这里用的是 Node.js 12.x
- name: Set up Node.js
uses: actions/setup-node@v1
with:
node-version: '12'
# 缓存 Node 模块,提高构建速度
- name: Get yarn cache directory path
id: yarn-cache-dir-path
run: echo "::set-output name=dir::$(yarn cache dir)"
- name: Use yarn cache
uses: actions/cache@v2
id: yarn-cache
with:
path: ${{ steps.yarn-cache-dir-path.outputs.dir }}
key: ${{ runner.os }}-yarn-${{ hashFiles('**/yarn.lock') }}
restore-keys: |
${{ runner.os }}-yarn-
# 安装依赖,我这里使用了 pandoc 渲染页面,所以先安装了 pandoc 再安装 Node 模块
- name: Install dependencies
run: |
wget https://github.com/jgm/pandoc/releases/download/2.10.1/pandoc-2.10.1-1-amd64.deb
sudo dpkg -i pandoc-2.10.1-1-amd64.deb
yarn install --prefer-offline --frozen-lockfile
# 从之前设置的 secret 获取部署私钥
- name: Set up environment
env:
DEPLOY_KEY: ${{ secrets.DEPLOY_KEY }}
run: |
sudo timedatectl set-timezone "Asia/Shanghai"
mkdir -p ~/.ssh
echo "$DEPLOY_KEY" > ~/.ssh/id_rsa
chmod 600 ~/.ssh/id_rsa
ssh-keyscan github.com >> ~/.ssh/known_hosts
# 生成并部署
- name: Deploy
run: |
npx hexo clean && npx hexo g && npx hexo d
```
然后再修改一下 Hexo 源文件夹中的 `_config.yml`:
```yaml
deploy:
type: git
repository:
[email protected]:yourname/yourname.github.io.git
branch: master
name: yourname
email:
[email protected]
```
这里注意一个问题:很多人(其中也包括我)会在安装主题时保留主题目录中的 `.git` 文件夹以方便更新,GitHub Actions 对 `git submodule` 的处理有点问题。(同为 CI 系统,Vercel、Cloudflare Pages 等就不存在这个问题)所以需要在 Workflow 文件中用 `with` 标注出你使用的 `submodule`
## 使用体验
Push 到仓库后自动触发 GitHub Actions 部署博客,大约 30s 左右就完成了,飞一般的速度!